

Optimizing Your SvelteKit Contact Page with Real-Time Telegram Notifications
Aug 30, 2023
5 min read
Creating a contact page is crucial for any business or personal website. However, it's equally important to find a convenient way to handle incoming messages. In this blog post, we'll cover how to set up a contact page in SvelteKit that not only collects user information but also sends real-time notifications to your Telegram account. Additionally, we'll implement reCAPTCHA v3 to prevent spamming.
Why Choose Telegram Over Traditional Email Services Like Mailgun?
- Cost-Effective: Telegram is a free service, unlike some email services that may require a subscription.
- Real-Time Notifications: Telegram notifications are virtually instantaneous, enabling immediate responses.
- Ease of Use: No need to constantly check your email. Get notifications directly on your mobile device or desktop.
- Low Latency: Telegram’s infrastructure ensures low latency, making it faster than email systems for notifications.
Create a New Bot and Get the Token and Chat ID
You will need a Bot token to send message to you, and to identify you, we need the chat ID.
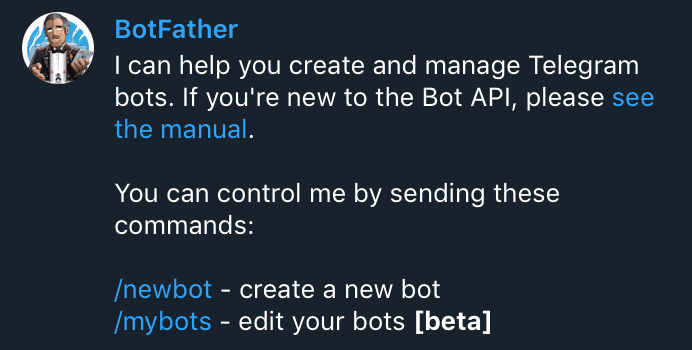
- Start a Conversation with BotFather: Search for BotFather in the Telegram app and start a conversation.
- Create a New Bot: Type
/newbotand follow the prompts to name your bot. - Receive the Token: Once the bot is created, you will get an API token. Keep this safe, as you'll need it for the SvelteKit integration.
- Get Your Chat ID: To get your chat ID, start a conversation with your new bot, and use a service like
https://api.telegram.org/bot<TOKEN>/getUpdatesto retrieve your chat ID from the JSON response. Or, you might send/my_idcommand to this bot to get your chat ID.

To initiate conversation, you must greet your bot at least once; otherwise, it won't be able to talk to you by default.
Combine with reCAPTCHA v3 to Prevent Spamming
Google's reCAPTCHA v3 offers an advanced spam prevention mechanism that doesn't require any action from the user, making the process seamless.

- Register Your Site: Head over to the reCAPTCHA website and register your website to get your API keys.
- Go to the Setting Page : Collect your Site Key and Secret Key
- Add Your Domains: On the same settings page, scroll down to the Domains section. Add the domains where your site will be live. It's often helpful to add
localhostto the domains list for local testing. Note that while this is for convenience, we will implement a check in the backend code to prevent abuse of this feature in a production environment.
Implement It on SvelteKit
Environment Variables
Firstly, ensure that your .env file contains the following environment variables. The site key for reCAPTCHA can be publicly embedded in the frontend.
# .envNOTIFICATION_BOT_TOKEN = ''MY_CHAT_ID = ''PUBLIC_RECAPTCHA_SITE_KEY = ''RECAPTCHA_SECRET_KEY = ''Frontend +page.svelte
One of the key aspects of this implementation is the use of Progressive Enhancement, a strategy for web design that emphasizes core webpage content first and then progressively adds more nuanced and technically rigorous layers on top of the content. In our case, you will see the use of use:enhance. This is a custom action that adds an additional layer of functionality to your basic form.
<!-- +page.svelte --><script lang="ts"> import { PUBLIC_RECAPTCHA_SITE_KEY } from '$env/static/public'; import { enhance } from '$app/forms'; export let form;</script><!-- load recaptcha api --><svelte:head> <script src="https://www.google.com/recaptcha/api.js?render={PUBLIC_RECAPTCHA_SITE_KEY}"></script></svelte:head><!-- Your form --><form method="POST" action="?/submit" use:enhance={async ({ formData }) => { await new Promise((resolve, reject) => { // create a promise to await grecaptcha.ready(resolve); }); const token = await grecaptcha.execute(PUBLIC_RECAPTCHA_SITE_KEY, { action: 'submit' }); formData.append('token', token); }} <!-- Your form elements (labels and inputs) --> <button type="submit">Send</button></form><!-- response from server -->{#if form?.success} <span>🛬Your message has been sent. Thank you for contacting me!</span>{/if}{#if form?.error} <span>{form.error}</span>{/if}Alternatively, you can use +server.js with fetch (see https://kit.svelte.dev/docs/form-actions#alternatives). However, you will expose the API URL.
Backend +page.server.js
In the backend part of SvelteKit, we'll handle the form submission, verify the reCAPTCHA token, and then send the Telegram message if the token is valid.
// +page.server.jsimport { fail } from '@sveltejs/kit';import { MY_CHAT_ID, NOTIFICATION_BOT_TOKEN, RECAPTCHA_SECRET_KEY } from '$env/static/private';export const actions = { submit: async ({ request }) => { const data = await request.formData(); const name = data.get('name'); const email = data.get('email'); const message = data.get('message'); const token = data.get('token'); // Prepare the data const postData = new URLSearchParams(); postData.append('secret', RECAPTCHA_SECRET_KEY); postData.append('response', token); // Make the request const response = await fetch('https://www.google.com/recaptcha/api/siteverify', { method: 'POST', headers: { 'Content-Type': 'application/x-www-form-urlencoded' }, body: postData }); const captchaData = await response.json(); const isDevelopment = process.env.NODE_ENV === 'development'; if (captchaData.hostname === 'localhost' && !isDevelopment) { return fail(400, { error: 'Operation not permitted for localhost in production' }); } if (captchaData.success && captchaData.score > 0.5 && captchaData.action === 'submit') { // Prepare Telegram message const telegramMessage = `*Name*: ${name}\n*Email*: ${email}\n*Message*: ${message}`; // Send message via Telegram Bot const telegramResponse = await fetch(`https://api.telegram.org/bot${NOTIFICATION_BOT_TOKEN}/sendMessage`, { method: 'POST', headers: { 'Content-Type': 'application/json' }, body: JSON.stringify({ chat_id: MY_CHAT_ID, text: telegramMessage, parse_mode: 'Markdown' }) } ); const telegramData = await telegramResponse.json(); if (telegramData.ok) { return { success: true }; } else { return fail(400, { error: telegramData.description }); } } return fail(400, { error: 'reCAPTCHA verification failed' }); }};Here's what this backend code is doing:
- Verify reCAPTCHA Token: Before processing the form data, we send a request to Google to verify the reCAPTCHA token.
- Send Telegram Notification: Once the reCAPTCHA token is verified, we use the Telegram Bot API to send a message to the chat ID specified.
- Error Handling: Finally, we have error-handling measures to cover scenarios like reCAPTCHA failure or Telegram API failure. The submit action will return the status 'success' or 'fail'—will be stored in the
formvariable. Corresponding messages will be automatically displayed on the webpage.
Bonus: Hide the reCAPTCHA Badge
In some cases, you might want to hide the reCAPTCHA badge for aesthetic reasons or to make the UI cleaner. To hide the badge, you can add the following CSS code to your stylesheet:
css.grecaptcha-badge { visibility: hidden; }
For the best practice, you may also include the terms of service (see this example).
Conclusion
And there you have it! With this setup, you'll receive real-time notifications on Telegram for every form submission, making it easier to stay connected and responsive. Happy coding!